Low Poly Vehicles
This tutorial is how to make low polygon vehicles, any one you want, in this case we will be making a Hummer! Choosing a flatter car is easier and will yield better results then choosing a car such as a Porsche or Ferrari Dino, which contain many curves (curves= many polygons).
Step 1. Getting the Picture:
The first step is to choose your car of course, the next step can be tricky. You have to find somewhere with many views of the car of your choice. For this tutorial I have supplied the images for you, when you go to fund your images try to find these views...
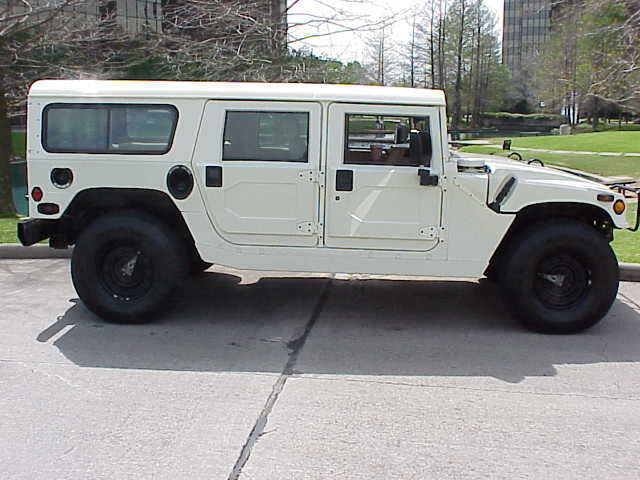
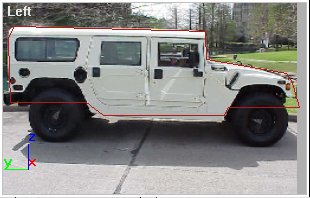
Side View
Back View and
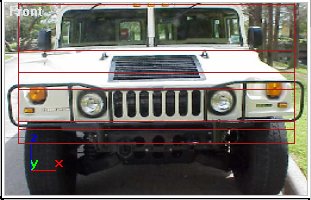
Front View
From these you can make a descent car or truck. For this example I have also included a hood shot as well as a whell shot. I recommend ebaymotors.com for finding the best pics, that is where these came from. You will have pictures like this...
I recommend editing these pictures, the new image will contain only the part you want on your car (do this for each part, the front view will have to be split into lights/grill and windshield)
Step 2. Make the Base
Now you have to make a base, your car will look nothing like you exected after this point, that's ok, this is what it should look like...
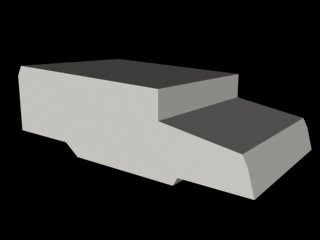
Like I said, nothing like it should. Now... how to do it. Open 3D Studio MAX and right click the left viewport. Choose Views and then ViewportBackground. In the display that comes up, choose file and find the picture of the right side of the vehicle (in this case it will be hummerside2.jpg). Also in the dialog window choose Match Bitmap (a radio button in the lower left.) Press OK.
Now choose Shapes from the toolbar on the right. Pick Line and outline the picture in the left viewport, ignoring the wheels. You should have this...
Now do the same thing in the front viewport as you did in the left one to display hummerfront1.jpg, only this time. Zoom in or out until the height of the 2D line you drew matches the hieght of the front picture. Now choose extrude under the Modifiers set in the toolbar on the right. Extrude the line until it's width matches that of the vehicle's front in the picture. It will look like this...
There you go, just make it white and your set!
Step 3. Applying the Pics
Now it becomes somewhat tricky. Select the vehicle and under the modifiers tab on the toolbar click the button that says "More..." at the top. This will display many more modifiers, from this list choose "Edit Mesh" and press OK. Now click the button marked "Sub Object" and in the roll down menu directly to the right of that choose "Polygon". Now you are able to select and modify single polgons individually.
At the top of the screen choose Tools and then Material Editor. Pick a sphere and below all of the pictures open the tab marked "Maps" under this tab click the button marked None beside Diffuse Color. Click "Bitmap" at the top of the list and press OK. Find the image hummerside2.jpg and open it.
Now back to the viewports. With the sub object polygon turned on just select one side of the vehicle (just click inside it in the left viewport). Under the Material Editor click the sphere containing hummerside2.jpg and click Assign Material to Selection, directly underneath the sphere pictures (it will be a small picture as a button). To the right of that choose Show Map in Viewport (also an image button, a checkered box). What? The side just turned white? What's wrong?
Now you must map the image. This is what takes the most tweaking to get right. Under the modifiers panel choose UVW map. This will display something on that white spot. It might look good and your set, or it might look very, very wrong. To fix this very, very wrong-ness you must tweak. To do this, try simply changing the alignment, or turn on the sub object gizmo and move it to the right area, also try changing the width, height, and length so that the organge box now shown on your image matches the area of the surface.
Like I said, this is dificult. Don't give up, try things and you will eventually get it, if it gets too screwed up just hit the trash can pic below the modifier roll down and start the UVW map process over!
Now that you have applied the side and it looks good, you're well on your way to being the owner of your own Hummer 3D Model. Do the same thing to every side, starting from the Edit Mesh and then selecting only the parts you want to apply an image to and mapping it. Now your hummer is complete, but without wheels! Just make some cylinders and apply a picture of a tire to it, and you're on your way!
Images used in this tutorial:
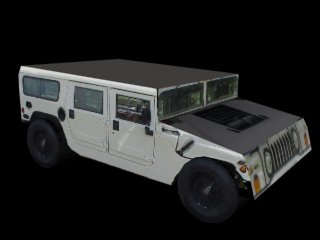
The Completed Hummer Pic
The Hummer Side (Unedited, hummerside1.jpg)
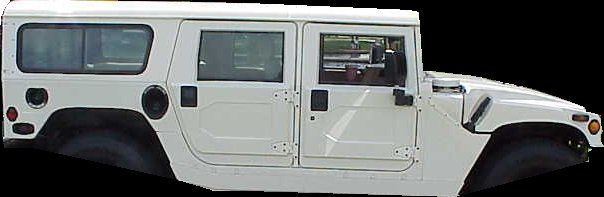
The Hummer Side (Edited, hummerside2.jpg)